For many QA/QC and warehouse teams, incoming inspection is still a mix of paper notes, emails, and ad-hoc Excel sheets. Lots get accepted or rejected, but it’s hard to prove why, and even harder to analyse supplier performance later.
This guide shows you how to build an incoming inspection form that:
- Captures all critical information in one place
- Connects to AQL sampling, MTCs and traceability
- Works both as Excel (XLSX) and printable PDF
- Fits naturally into your existing NTIA QA/QC toolkit
You’ll see exactly which fields to include, how to structure the workbook, and how to adapt the template for different risk levels.
Quick Answer – What Is an Incoming Inspection Form (And Who Is It For)?
An incoming inspection form (or receiving inspection form) is the standard document used to:
- Record the details of each lot or delivery line
- Link the delivery to the PO, drawing, specification and standards
- Document sampling, defects and AQL results
- Decide and communicate Accept / Reject / Hold
- Provide traceable input for NCRs, IRs and supplier KPIs
Typical users:
- QA/QC engineers and inspectors – checking materials against specs
- Warehouse / receiving teams – verifying quantities and condition before storage
- Supplier quality / SQS teams – analysing defects, NCRs and vendor performance
The form sits between delivery and stock: once it’s signed off, the material moves into inventory or into a segregated hold/reject area.
For the sampling side, pair this form with
Receiving Inspection Sampling Plans (AQL): Explained
so inspectors know how many units to check and which AQLs to apply.
Where the Incoming Inspection Form Fits in the QA/QC Workflow
In a typical QA/QC workflow for raw materials and components:
- Purchase Order is placed, with drawing/spec and QA requirements.
- Supplier ships the goods with a packing list, certificates and labels.
- The warehouse receives the delivery and triggers incoming inspection.
- Inspector uses the Incoming Inspection Form to:
- Check documents and identification
- Apply AQL sampling and inspection
- Decide on disposition (accept / reject / hold)
- If there are issues, an IR/NCR is raised and logged.
- Approved materials move into stock or to production/site; rejected materials are segregated.
The form is the evidence that the lot was properly checked. It creates structured data that later feeds:
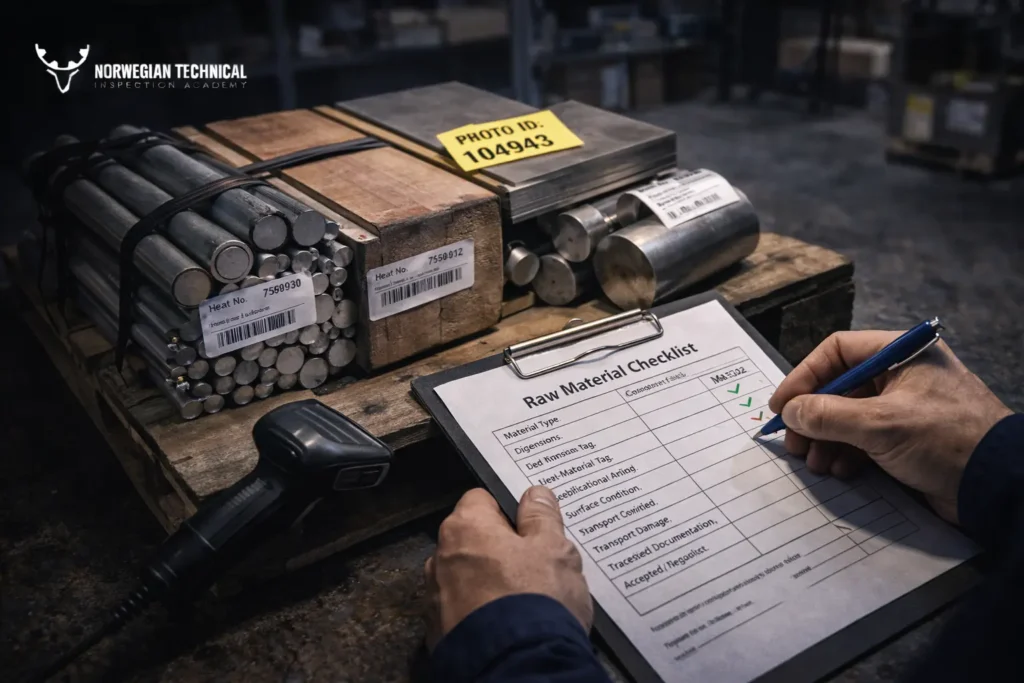
What a Good Incoming Inspection Form Must Capture (Core Fields)
A useful incoming inspection form focuses on five information blocks:
- Header – who, what, when
- Sampling & reference data
- Documentation & traceability
- Visual / dimensional / material checks
- Disposition and NCR reference
You can think of each row in the form as a compact story of one lot:
- What was delivered?
- Against which specification?
- How was it checked?
- What did we find?
- What decision did we make?
Workbook Structure (XLSX + PDF)
A practical Excel workbook for incoming inspection usually contains at least three sheets:
- Sheet 1 – Incoming Inspection Form (Log)
- Every row = one lot or delivery line inspected.
- This is also the basis for the PDF version (for printing and handwriting if needed).
- Sheet 2 – Acceptance Criteria & Sampling Plan
- Central place for specs, AQLs and test requirements per material/part.
- The form (Sheet 1) refers to this sheet instead of repeating acceptance criteria in every row.
- Sheet 3 – NCR & Defect Log (Optional but recommended)
- Summary of all NCRs and major defects triggered by incoming inspection.
- Supports supplier analysis and SQS KPI calculations.
The PDF template is usually a clean, one- or two-page layout of Sheet 1 with space to write key results and attach signatures.
Sheet 1 – Incoming Inspection Form (Row Layout)
Each row represents a single lot or line item from a delivery. Recommended columns:
- Basic Identification
- PO No.
- PO Line Item
- Supplier
- Item / Part No.
- Item Description
- Drawing / Spec Reference
- Standard (e.g. ASTM, EN, ASME) if applicable
- Lot & Quantity
- Lot / Batch / Heat Number
- Quantity Delivered
- Quantity Ordered (for comparison)
- Sampling & AQL
- Lot Size (units)
- Sample Size (units inspected)
- AQL Reference (for example “AQL 1.0 / AQL 2.5; see AQL sheet”)
- Inspection Level (e.g. General Level II)
- For the actual sampling decision logic, refer to your AQL sheet, based on
Receiving Inspection Sampling Plans (AQL): Explained.
- Documentation Check
- Packing List vs PO (match: Yes/No)
- Certificates Attached (Yes/No, EN 10204 3.1/3.2, CoC, etc.)
- Documentation Result (Pass / Fail)
- Document Reference Numbers (certificate IDs, revision, etc.)
- Identification & Traceability
- Labels present and legible (Yes/No)
- Product markings (heat numbers, batch codes, grade) verified (Yes/No)
- Markings match certificates (Yes/No)
- Packaging & Transport Condition
- Packaging condition (OK / damaged / contaminated)
- Signs of water ingress, impact damage or tampering (Yes/No + comments)
- Visual Condition
- Visual inspection performed (Yes/No)
- Visual defects found (Yes/No)
- Defect classification (Critical / Major / Minor)
- Short description or defect code
- Dimensional Check
- Dimensional inspection performed (Yes/No)
- Critical dimensions checked (Yes/No)
- Reference to drawing or characteristic number
- Dimensional result (Pass / Fail + comment)
- For the practical “how to” of visual and dimensional checks, align with
Visual & Dimensional Inspection – Step-by-Step Checklist.
- Material Verification
- MTC reviewed (Yes/No, Ref)
- Heat number on part matches MTC (Yes/No)
- PMI performed (Yes/No, result) if required
- Hardness / lab test performed (Yes/No, result) if required
- For the certificate side, see
EN 10204 3.1 vs 3.2: Differences Explained (Free Certificate Checklist)
and
MTC Interpretation Guide + Checklist (PDF).
- AQL & Defect Summary
- No. of units inspected
- Critical defects found
- Major defects found
- Minor defects found
- AQL applied (for each defect class)
- Lot decision vs AQL (Accept / Reject)
- Disposition & Segregation
- Overall Result (Accept / Reject / Conditional)
- Segregation location for rejected/hold material
- Special instructions to warehouse/production
- NCR & Sign-off
- NCR No. (if raised)
- IR No. (if used)
- Inspector Name / Signature / Date
- QA/QC Approver (if required)
This structured layout makes it very easy to filter, pivot and analyse incoming inspection performance over time.
Documentation, Certificates & Traceability Block
Many incoming inspection issues are not physical defects but documentation and traceability problems. The form should make this visible by separating:
- “Documentation attached?” versus “Documentation accepted?”
- “Markings legible?” versus “Markings match MTC?”
Typical checks:
- Do packing list and delivery note match the PO and actual quantities?
- Are EN 10204 certificates, CoA/CoC, and any mandatory test reports present?
- Does each item carry the expected label or stamp (grade, size, heat, batch)?
- Does the heat number on the material match the one on the MTC?
The more consistently these checks are recorded, the easier it is to:
- raise targeted NCRs when documentation is systematically weak
- distinguish between physical quality problems and traceability problems
- support audits with clear evidence of your receiving controls
Visual & Packaging Checks Section
A good form doesn’t treat visual and packaging as an afterthought. Typical fields:
- Packaging status: OK / damaged / contaminated / wet / opened
- Protective covers and caps in place where required (Yes/No)
- Corrosion, dents, cracks or other obvious damage (Yes/No)
- Cleanliness status (free of oil/grease where not allowed, no foreign objects)
- Defect class: Critical / Major / Minor
- Photo evidence reference (photo ID or file name, if you use photos)
This level of detail is especially important for:
- safety-critical items (pressure parts, lifting components)
- coated surfaces or linings
- items exposed to long transport chains or outdoor storage
Dimensional & Specification Check Section
You rarely want to re-measure everything; instead you focus on:
- Critical dimensions called out on the drawing
- Fit & interface dimensions (OD, ID, flange dimensions, bolt circles)
- Thickness, length, angle where tolerance is tight or safety-related
Fields to include:
- “Dimensional check required?” (Yes/No, based on your acceptance criteria sheet)
- “Characteristics checked” (reference numbers or short text)
- “Dimensional result” (Pass / Fail)
- “Max deviation from tolerance” (for example +0.3 mm)
This gives you enough information to:
- justify acceptance or rejection,
- spot repeating dimensional issues from the same supplier or batch,
- feed meaningful data into NCRs and supplier reviews.
Material Verification – MTC, PMI & Lab Tests
Depending on material criticality, your incoming inspection may require:
- MTC review only (for standard items)
- MTC + positive material identification (PMI)
- MTC + hardness / mechanical testing
- Full lab analysis for certain critical or regulated materials
The form should allow you to record:
- “MTC reviewed?” (Yes/No, with certificate reference)
- “Heat numbers match markings?” (Yes/No)
- “PMI performed?” (Yes/No, result: OK / Not OK)
- “Hardness or lab test performed?” (Yes/No, result + reference)
This aligns receiving inspection with the deeper guidance in NTIA’s material-focused articles and training.
AQL & Defect Summary – Connecting the Form to Sampling Plans
When you apply statistical sampling:
- You don’t inspect every unit.
- You need a repeatable way to decide Accept/Reject.
The AQL article already defines how to:
- choose inspection level,
- find code letter and sample size,
- get accept/reject numbers for different defect classes.
Your incoming inspection form should capture:
- Lot size (total units delivered)
- Inspection level (e.g. General Level II)
- Code letter from ISO 2859-1 table
- Sample size actually inspected
- AQLs used for Critical, Major and Minor defects
- Defects counted in each category
- Final decision vs AQL (Accept / Reject / Conditional)
The actual calculation logic lives in Sheet 2 – Acceptance Criteria & Sampling Plan, linked to the article
Receiving Inspection Sampling Plans (AQL): Explained.
Disposition, Segregation & NCR Reference
The form must end with a clear, unambiguous decision:
- Accept – lot released to stock or production.
- Conditional – limited use, rework required, or 100% re-check.
- Reject – lot rejected, NCR mandatory, segregated in a defined area.
Recommended fields:
- Final disposition (Accept / Reject / Conditional)
- Storage location for accepted material
- Segregation location for rejected/hold material
- NCR number and IR number (if your system uses both)
- Short summary of the reason (for quick scanning later)
This makes sure warehouse staff and planners always know what they can use – and what must never leave the quarantine area.
Sheet 2 – Acceptance Criteria & Sampling Plan (Brains of the Template)
Instead of writing all tolerances and tests every time, keep them in a central criteria sheet. Typical columns:
- Item / Material / Part No.
- Category (plate, pipe, fitting, fastener, chemical, etc.)
- Description
- Reference Drawing / Datasheet / Spec
- Applicable standards (ASTM, EN, ASME…)
- Required checks at incoming stage:
- Documentation (MTC, CoC, etc.)
- Identification & marking
- Visual
- Dimensional
- PMI
- Hardness / lab tests
- AQL level and inspection level for each category
- Any special notes (e.g. impact-tested, NACE, coating system)
Inspectors then only need to:
- select the item number / category,
- see which checks are required,
- apply the right sampling plan and AQL.
This keeps the form simple and the rules centralised.
Sheet 3 – NCR & Defect Log (Optional but Powerful)
If you want to turn incoming inspection data into supplier performance insights, add a third sheet that logs:
- Date
- Supplier
- Item / Material
- NCR No.
- Defect type (documentation, identification, visual, dimensional, material)
- Defect class (Critical / Major / Minor)
- Root cause (once investigated)
- Corrective action and closure date
This log is the bridge between incoming inspection and:
- supplier KPIs and scorecards,
- trend analysis (for example repeated documentation issues on raw plate),
- management reviews and sourcing decisions.
Example – One Completed Incoming Inspection Row
To make it more concrete, here is a simplified example of one completed row for a carbon steel plate:
- PO No.: 45001234, Line 20
- Supplier: ABC Steel Ltd.
- Item / Description: S355J2+N plate 20 mm, 2000 × 6000 mm
- Drawing/Spec Ref: DRW-PL-001 Rev. 2 / Spec SP-123
- Standard: EN 10025-2
- Lot / Heat No.: HN 789456
- Quantity Delivered: 12 plates
- Lot Size: 12 units
- Sample Size: 3 units
- AQL Ref: AQL 1.0 / 2.5, General Level II (see AQL sheet)
- Documentation: EN 10204 3.1 certificate attached, matched PO and drawing → Pass
- Identification: Heat number stamped on all plates, matches MTC → Pass
- Packaging: Wrapped, no visible transport damage → Pass
- Visual: No corrosion, no dents or cracks → Pass
- Dimensional: Thickness and overall dimensions within tolerance on all 3 samples → Pass
- Material verification: MTC reviewed (chemistry, mechanicals OK), no additional tests required → Pass
- Defects: Critical 0, Major 0, Minor 0
- Disposition: Accept
- NCR: N/A
- Inspector: J. Smith, Date: 2025-11-29
Such examples in your procedure or work instruction help new inspectors understand how to fill the form correctly.
How to Adapt the Template for Different Risk Levels
Not all materials deserve the same level of effort. You can adapt the form usage as follows:
- High-risk / safety-critical items
- Full use of all sections (documentation, visual, dimensional, material tests)
- Strict AQL with low tolerance for major/minor defects
- Mandatory NCR for any deviation
- Medium-risk items
- Focus on documentation, identification and key dimensions
- AQL applied, but with standard defect thresholds
- NCR only for repeated or significant issues
- Low-risk / consumables
- Basic checks: quantity, obvious damage, labels, expiry (if relevant)
- Minimal sampling or even 100% visual only
- Simple pass/fail decision without detailed defect logging
The underlying Excel structure stays the same; you just decide which fields are mandatory per risk class.
Connecting the Incoming Inspection Form to Other NTIA Tools
Your incoming inspection form doesn’t stand alone. It works best as part of the NTIA QA/QC toolkit:
Together, they give you a consistent workflow from receiving inspection at the warehouse door to NCR closure and supplier review.
Download – Incoming Inspection Form Template (XLSX/PDF)
A practical incoming inspection template should give you:
- XLSX version
- Sheet 1: Incoming Inspection Form (log of lots)
- Sheet 2: Acceptance Criteria & Sampling Plan
- Sheet 3: NCR & Defect Log (optional)
- PDF version
- Clean, print-friendly layout of Sheet 1
- Space for signatures, NCR reference and critical notes
Use the Excel version for day-to-day digital work and data analysis. Use the PDF version when:
- inspections are done in areas without easy PC/tablet access, or
- clients/auditors request signed hard copies.
If you already use NTIA’s Master QA/QC Templates Pack, this incoming inspection form can slot in as the receiving gate for your raw materials, feeding data into your NCR system and vendor scorecards.
With a well-designed incoming inspection form, you move from “we looked at it and it seemed fine” to traceable, data-driven acceptance decisions that protect both your plant and your projects.
3 Responses
Hi there everybody, here every one is sharing such knowledge,
therefore it’s fastidious to read this webpage,
and I used to pay a quick visit this website all the time.
Terrific post however , I was wondering if you could write a litte more on this topic?
I’d be very grateful if you could elaborate a little bit more.
Cheers!
It’s going to be ending of mine day, however before
end I am reading this wonderful piece of writing to increase
my experience.