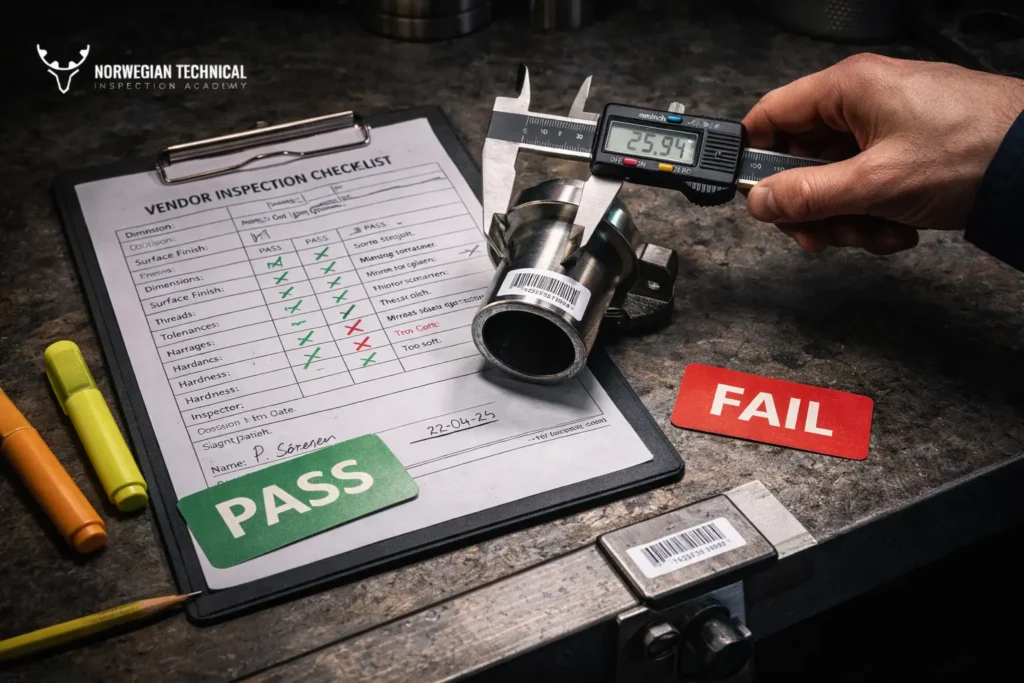
Vendor Inspection Checklist & Acceptance Criteria (Practical Guide)

Walk into a vendor’s shop without a checklist and clear acceptance criteria, and you are depending on memory and luck. A simple, structured checklist helps you:

  • Know exactly what to look at
  • Decide consistently when to accept, conditionally accept or reject
  • Write defensible inspection reports later

This guide gives you a compact, text-based vendor inspection checklist that fits most equipment types and can be adapted easily.

It complements NTIA content such as
What Is Vendor Inspection? Roles & Responsibilities,
Vendor Inspection Reporting: IR, NCR & Final Dossier
and
Common Vendor Nonconformities & How to Fix Them.

Vendor Inspection Checklist vs ITP and QCP

Before building a checklist, it helps to clarify what it is not.

An Inspection and Test Plan (ITP) is a planning document. It shows operations, inspection and test points, and whether the client will review, witness, hold or monitor them. It answers: what will be done, when and at which level of client involvement?

A Quality Control Plan (QCP) is the vendor’s internal process control plan: what they monitor to keep the process stable and compliant.

A vendor inspection checklist is the inspector’s execution tool. It answers:

  • What exactly will I look at during this visit?
  • How will I decide if each item is acceptable or not?
  • What will I write in my report if it is not acceptable?

In practice:

  • The ITP tells you when and where to inspect.
  • The checklist tells you what to look at and what “OK” means.
  • The report (see Vendor Inspection Reporting) records what you found against that checklist.

Without a checklist, inspectors fall back on memory and habits. Without acceptance criteria, everything becomes “inspector’s opinion” instead of a defensible decision.

If you want a practical ITP/QCP framework that aligns perfectly with how checklists and dossiers work, use:
ITP & QCP in Vendor Inspection — 6-Step Builder + Templates.

Core Sections of a Vendor Inspection Checklist

You can cover most vendor inspections with six sections:

  • Pre-inspection documentation
  • Materials and certificates
  • In-process visual and dimensional checks
  • Functional and performance tests
  • Marking, preservation and packaging
  • Final review and release

Pre-Inspection Documentation Review

The shop visit always starts at a desk.

Before you look at any equipment, you confirm that documents are complete, current and consistent. This avoids the classic situation where you witness a test to an obsolete drawing or unapproved procedure.

Typical checklist items:

  • Latest purchase order (PO) and amendments available and understood
  • Latest approved datasheets available
  • Latest approved drawings (GA, fabrication, welding, assembly) available
  • Latest approved ITP and QCP available
  • All client comments and design review actions incorporated
  • Welding procedures (WPS/PQR), NDE procedures and test procedures approved, where applicable
  • Calibration certificates available and valid for all critical instruments and gauges

High-level acceptance criteria:

  • Documents in the vendor’s shop match the current project revision.
  • All procedures that affect the inspection scope are approved before you witness operations or tests.
  • Any deviation from project spec, code or datasheet is covered by an approved deviation or concession.

If documents are not in order, you record this on your checklist and either delay certain checks or raise an NCR, depending on severity.

Materials and Certificates: Heat Numbers and Compliance

If the wrong material goes into the equipment, no amount of perfect testing will fix it.

This section of the checklist focuses on identity and traceability:

  • Materials received match the bill of materials and datasheets (grade, size, standard)
  • EN 10204 material test certificates (3.1 or 3.2 as required) are available and complete
  • Heat numbers on materials match the MTCs
  • Any alternative materials or substitutes are supported by approved deviations
  • Material storage and segregation are adequate to prevent mix-ups
  • For critical items, PMI or hardness results (if required) are available and acceptable

Acceptance criteria:

  • There is a clear, auditable link from material marking (grade and heat number) to MTC and PO.
  • Material grades and product forms used in manufacture match the datasheet and drawing.
  • Any deviation from the specified material is formally approved and documented.

For the exact “how” of traceability and certificate matching, use
Heat Numbers, Traceability & Certificate Matching.
For the certificate side, these two are your fast references:
EN 10204 3.1 vs 3.2
and
MTC Interpretation Guide.

In-Process Visual and Dimensional Checks

Once documents and materials are under control, you look at the product itself.

The goal here is to catch issues early, before coating, insulation or assembly hide defects. This section should be tailored to the equipment, but often includes:

Visual checks:

  • No visible cracks, impact damage or excessive corrosion on main parts
  • Welds free from obvious defects: unacceptable undercut, overlap, arc strikes, spatter, excessive porosity
  • Weld sizes and profiles consistent with drawings and applicable welding standard
  • NDE completed as per ITP (RT, UT, MT/PT) and results acceptable
  • Surface preparation before coating (blast profile, cleanliness) is acceptable, if in scope

Dimensional checks:

  • Critical dimensions measured and recorded (nozzle locations, face-to-face, flange PCD, thicknesses, overall height/length)
  • Tolerances respected as per drawings or project standards
  • Alignment and squareness acceptable (for rotating equipment, skid frames, structures)
  • For rotating equipment, alignment between driver and driven machine within permissible tolerances

Acceptance criteria:

  • Visual discontinuities are within limits of the relevant fabrication or welding standard (or project spec).
  • Measured dimensions are within tolerances defined on the drawing or in project standards.
  • Any out-of-tolerance dimension or serious visual defect is either corrected or recorded as a nonconformity before progressing.

If you want a ready, step-by-step structure for this section, map it to
Visual & Dimensional Inspection Guide (Step-by-Step).

Functional and Performance Tests at Vendor Shop

Functional and performance tests are where you see whether the equipment actually does its job.

Your checklist needs to capture both preconditions and results:

Preconditions:

  • Approved test procedures available at the test area
  • Test instruments calibrated and identification numbers recorded
  • Test setup matches the procedure (supports, connections, loading, direction of rotation, etc.)
  • Safety measures in place (guards, barriers, drain and vent lines, test pressures clearly marked)

During testing:

  • Required test parameters achieved (pressure, flow, load, speed, voltage, etc.)
  • Specified test duration achieved (pressure hold time, running time, cycling)
  • Equipment operates correctly throughout the test (no abnormal vibration, overheating, noise, leaks)
  • All readings recorded and signed by operator and inspector where required

Acceptance criteria:

  • Tests are performed strictly in line with the approved procedures and ITP (not “similar to” or “almost”).
  • Measured values (pressure, temperature, flow, torque, speed) meet or exceed the required test levels.
  • No leakage or malfunction beyond the acceptance criteria set in the relevant codes, standards or project specification.
  • Any failure leads to investigation, corrective action and repeat test; you record both the failure and the retest outcome.

For valves specifically, it helps to keep your test evidence aligned with the reporting logic in
Write a Valve Inspection Report (With Sample).

Marking, Preservation, Packaging and Documentation

Many inspections focus only on fabrication and testing and forget the last step: how the equipment will survive transport, storage and installation.

A robust checklist always covers:

Marking:

  • Nameplates fitted and legible (tag number, rating, manufacturer, serial, key parameters)
  • Permanent markings (heat numbers, flow arrows, orientation marks) present where required
  • Marking matches datasheets, drawings and purchase order

Preservation and protection:

  • Internal preservation (rust preventives, desiccants, protective oils) applied according to spec
  • All open ends capped or plugged (nozzles, flanges, ports)
  • Sensitive surfaces protected (machined faces, seals, glass, instrument faces)

Packaging:

  • Packaging type adequate for transport (crating, pallets, blocking and bracing)
  • Lifting points and instructions clearly marked
  • Handling precautions indicated (upright only, centre-of-gravity marking, shock-sensitive labels if needed)

Documentation:

  • Test reports and certificates completed and signed
  • Material certificates and inspection records compiled as per PO/ITP
  • Packing list prepared and matches the physical items
  • Any special tools, spares and loose items packed and listed

Acceptance criteria:

  • Equipment can be transported and stored without damage or loss of identity.
  • All required documentation is available at the time of final inspection and linked to the equipment tag and serial number.

When you want your packaging/marking evidence to survive audits and disputes, align the “photo + document” logic with
Receiving Photo & Documentation SOP.

Final Review, Punch List and Release

The last section of your checklist is about closing the loop.

Here, you confirm that:

  • All sections of the checklist have been completed (no unexplained blanks)
  • NCRs raised during the visit are listed with their status (open/closed/accepted under concession)
  • Small, non-critical punch list items (minor paint touch-up, missing nameplates, missing minor documents) are recorded, with agreed deadlines and responsible parties
  • The overall status is clear: ready for release, conditional release or not acceptable

Acceptance criteria:

  • Major nonconformities (affecting safety, function, code compliance or contract) are closed or formally accepted before shipment.
  • Conditional releases are used sparingly and only for minor issues that do not affect fit, function or safety.
  • The inspector’s release note or inspection release certificate is consistent with the checklist findings and with the vendor inspection report.

Sample Vendor Inspection Checklist

Below is a compact, text-only template you can adapt into your own form.

Vendor Inspection Checklist – Summary

Project: ____________________________
PO No.: ____________________________
Vendor: ____________________________
Equipment Tag(s): ___________________
Inspector: __________________________
Date: ______________________________

Pre-Inspection Documentation
[ ] Latest PO, datasheets and drawings available and aligned
[ ] ITP and QCP approved and issued
[ ] Test / welding / NDE procedures approved where applicable
[ ] Calibration certificates valid for critical instruments
Comments: __________________________

Materials and Certificates
[ ] Material grades match BOM and datasheets
[ ] Heat numbers on parts match material certificates
[ ] Required EN 10204 certificates available and signed
[ ] Any substitute material supported by approved deviation
Comments: __________________________

In-Process Visual and Dimensional Checks
[ ] No unacceptable visual defects (surface, welds, fabrication)
[ ] NDE performed as per ITP and results acceptable
[ ] Critical dimensions checked and within tolerance
[ ] Alignment and orientation acceptable
Comments: __________________________

Functional and Performance Tests
[ ] Approved test procedures used
[ ] Test setup correct and safe
[ ] Required test levels (pressure, flow, speed, etc.) achieved
[ ] Results recorded and within acceptance criteria
Comments: __________________________

Marking, Preservation and Packaging
[ ] Nameplates and permanent markings correct and legible
[ ] Internal preservation and protection completed
[ ] Open ends capped/plugged and sensitive parts protected
[ ] Packaging and lifting arrangements suitable for transport
[ ] Final documentation pack complete
Comments: __________________________

Overall Status and Release
[ ] No major nonconformities outstanding
[ ] Punch list items documented and agreed
[ ] NCRs raised (Nos. ________) with status noted
Overall conclusion:
☐ Accepted
☐ Conditionally accepted (punch list attached)
☐ Not accepted (NCR issued)
Inspector signature: _____________________
Vendor representative: ___________________

Using Acceptance Criteria Instead of “As Per Spec”

The value of a checklist depends on how clearly “OK” and “not OK” are defined.

Wherever possible, define acceptance criteria in terms of:

  • a specific standard or code
  • a project specification clause
  • a drawing tolerance
  • a clearly measurable test result

Examples:

  • “Nozzle projection within ±3 mm of drawing dimension”
  • “Hydrostatic test at 1.5 × design pressure for 30 minutes with no visible leakage”
  • “Seat leakage not exceeding Class IV as per applicable valve test standard”
  • “Coating DFT within 200–300 µm for system X; no runs, sags, holidays”

If a project spec uses generic language (“as per manufacturer’s recommendation”), consider capturing the key value in your checklist once the manufacturer’s documentation is agreed.

Adapting the Checklist for Different Equipment Types

The core sections stay the same, but the details change by equipment:

Valves
extra focus on body and trim material verification, seat and shell tests, torque, actuation and leakage classes

Pumps and rotating equipment
additional checks on rotor balancing, alignment, vibration levels, bearing temperatures, NPSH and performance curves

Pressure vessels and heat exchangers
more extensive welding, NDE, PWHT, nozzle orientation and internal inspection items; hydrotest and, where applicable, pneumatic or leak tests

Skids and packaged units
integrated checks on piping, instrumentation, electrical, control logic, and overall layout

Rather than writing completely different checklists for each item, build a common skeleton and then bolt on equipment-specific pages.

If you want a ready-to-use library of modular forms (ITPs, checklists, and inspection records) built exactly for this “skeleton + bolt-on” approach, use
Master QA/QC Templates Pack (ITP, Checklists & Forms)
and
QA/QC & Inspection Teams Templates.

Common Mistakes When Using Vendor Inspection Checklists

Even good checklists are often misused. Some recurring problems:

  • Treating the checklist as a formality (boxes ticked without meaningful inspection, comments left blank)
  • Leaving acceptance criteria vague (“OK as per spec” with no reference to which spec or limit)
  • Not updating checklists when project specs change (old tolerances and test levels carried over from previous projects)
  • No link between checklist and NCRs (nonconformities noted in one place, not reflected in the formal NCR system)
  • Checklists not attached to final dossier (after release, nobody can see what was actually checked and how)

The solution is mostly cultural and procedural:

  • keep the checklist short enough to be used consistently
  • train inspectors on how to use it and how to reference acceptance criteria
  • make it mandatory to attach completed checklists to inspection reports and final documentation packs

Turning Checklists into Evidence: Reports and Records

A vendor inspection checklist is not an end in itself; it feeds into:

  • the inspection report (interim and final)
  • the NCR log and concession records
  • the final dossier for that equipment

Best practice:

  • reference the checklist sections explicitly in your inspection report
  • refer to checklists in NCRs (“see Section 3, dimensional check item X for details”)
  • ensure the final dossier includes: checklists, test reports, certificates, NCRs and concessions, release notes

To avoid mixing “audit” logic with “inspection” logic in your evidence pack, keep the boundary clear using
Vendor Audit vs Inspection: Differences & Use Cases.

From Checklist to Competence

A short, clear checklist like this makes your inspections more consistent and your decisions easier to defend. But it is only one part of the picture.

NTIA’s vendor inspection training goes deeper into: how to build ITPs that reflect real risk; how to choose realistic acceptance criteria instead of “as per spec”; and how to link checklists, NCRs and final dossiers.

If vendor inspection is part of your day-to-day role, you’ll typically get the fastest skill-up via
Vendor Inspection & Quality Surveillance Training Course,
and for documentation/output quality specifically:
Vendor Inspection Reports & Deliverables Training.

Tag
Share

Leave a Reply

Your email address will not be published. Required fields are marked *

Table of Contents

h

Categories

Categories

Recent Post