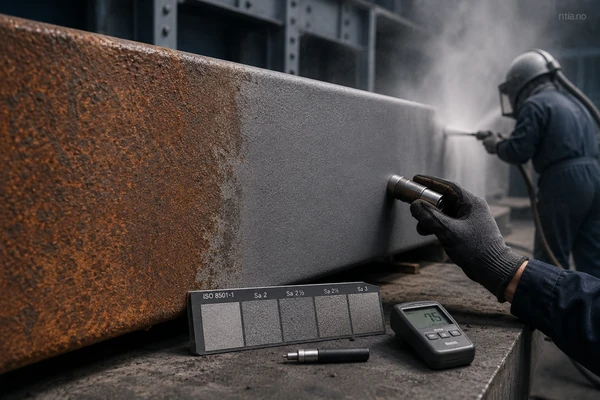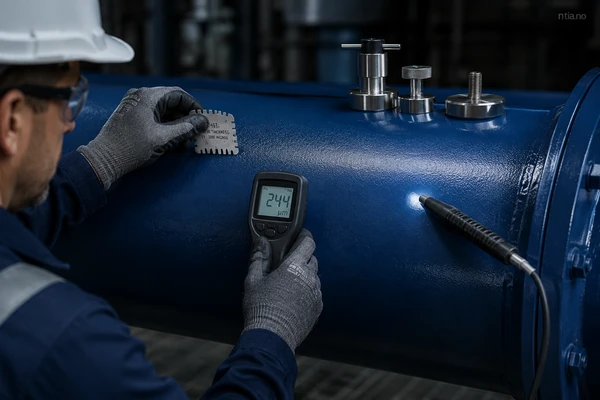
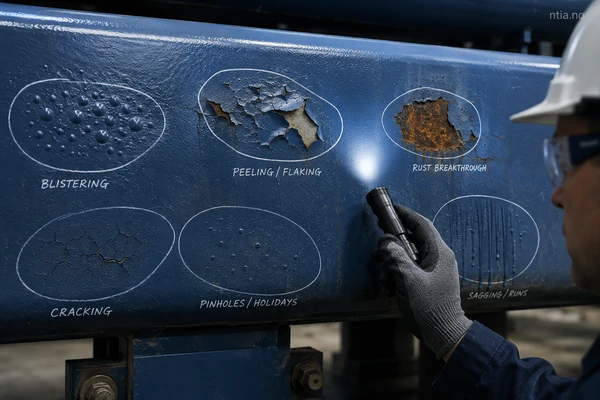
A coating defect is an observed condition that may affect appearance, protection or compliance. It is not proof of a particular cause or automatically a nonconformity. Inspectors protect the decision by recording what is visible, checking the requirement, collecting evidence and controlling repair and retest.
This field guide covers defects from application through service and connects recognition to the wider coating inspection process.
The first inspection task is classification, not diagnosis. A useful finding separates the observed condition, requirement, evidence, cause status and approved disposition.
| DEFINITION CONTROL: A defect is the condition observed. A cause is an explanation supported by evidence. A nonconformity is failure to fulfil a specified requirement. A punch item is an incomplete or minor item managed through the project’s punch process; it is not automatically an NCR. Failure analysis is a deeper causal investigation that may require specialist or laboratory support. |
This prevents a familiar reporting error: “Blistering caused by poor surface preparation.” Blistering is observable. Poor preparation may be one contributor, but moisture, soluble contamination, retained solvent, temperature, service exposure or system compatibility may also need consideration. The report should not turn one possibility into a fact.
Timing narrows the investigation. The same appearance can have different implications depending on whether it was first seen during application, after cure, during holiday testing, after handling or after months in service.
| Defect family | Typical stage first noticed | Examples | Immediate inspection question |
|---|---|---|---|
| Application and appearance | During application or shortly after | Runs, sags, dry spray, overspray, orange peel, wrinkling | What changed in application, material condition, geometry or environment? |
| Discontinuity and coverage | After application or during testing | Pinholes, holidays, pores, missed areas, low coverage at edges | Is the film continuous and does it meet the specified coverage or test requirement? |
| Adhesion and cure | During handling, testing or early service | Peeling, delamination, soft film, poor adhesion, intercoat separation | Which interface failed, and what do preparation, cure and recoat records show? |
| Ageing and service deterioration | After exposure | Blistering, cracking, checking, flaking, chalking, rusting, underfilm corrosion | What is the distribution, severity and service history, and is the damage active? |
Classification does not establish acceptance. A cosmetic issue may violate a finish requirement, while a small discontinuity in immersion service may be functionally critical. The specification and service duty determine significance.
These application-related conditions should be described by appearance and location, then checked against film build, application records and the specified finish. Do not diagnose them from texture alone.
Runs and sags appear as downward movement, curtains, waves or local accumulations. Possible contributors include excessive wet film, unsuitable viscosity, over-thinning, close application, slow passes, low temperature or complex geometry. Check available wet-film records, cured dry-film thickness, mixing data, thinner authorization, spray settings and adjacent work.
Dry spray and overspray may appear rough, porous, powdery or poorly coalesced. Possible contributors include excessive gun distance, high atomizing pressure, hot or windy conditions, fast solvent loss or poor access. Confirm whether the roughness is loose or embedded and whether it affects adhesion or continuity.
Orange peel is an uneven, dimpled texture. Possible contributors include atomization, viscosity, solvent balance, film build or limited levelling. It should not be confused with dry spray because both look rough. Compare adjacent areas under consistent lighting and identify whether the requirement is visual, functional or both.
The disposition may range from documented acceptance to abrasion and overcoating or removal and reapplication. Unless assigned that authority, the inspector verifies rather than prescribes the approved repair.
Pinholes, holidays and missed coverage all indicate possible discontinuity, but they are not identical observations. A pinhole is a small pore or opening; a holiday is a discontinuity detected by an applicable inspection method; missed coverage is an area where the intended coating has not been applied or has not covered the substrate or previous layer.
First record how the condition was found: visual inspection, low-voltage wet-sponge testing, high-voltage testing or another approved method. The coating type, thickness, service, substrate, cure condition and project procedure determine whether holiday testing is appropriate and how it is performed. There is no universal test voltage or acceptance threshold for all coating systems.
Possible contributors include air release, substrate porosity, entrapped gas, contamination, excessive film build, rapid skinning, poor application technique, difficult geometry or inadequate stripe coating. These are investigation paths, not conclusions. Useful evidence includes surface-preparation records, mixing and induction data, application method, film-thickness distribution, cure status and the location pattern around welds, edges, pits or porous substrates.
Mark each discontinuity without damaging accepted coating, if the approved procedure allows it. After repair, repeat the specified test over the repaired area and any required surrounding zone. Industry guidance on holiday control follows the same basic principle: detect, repair and retest. A closed repair record should identify the location, test method, equipment, settings required by the procedure, repair system, retest result and acceptance.
| SAFETY AND AUTHORIZATION: Holiday testing can damage uncured, thin or unsuitable coatings and can introduce electrical hazards. Use only the approved method, competent personnel and equipment specified for the system. |
Blistering is a local separation that forms a raised dome or swelling in the coating. A useful inspection record describes its size, frequency, distribution, location, layer and whether the blisters appear intact, broken, dry or fluid-filled.
ISO 4628-2:2016 provides a pictorial method for assessing blistering, while ASTM lists D714-25 for evaluating degree of blistering. Use the method named by the project. Do not combine an ISO rating with an ASTM rating as though they were one scale unless the approved procedure explicitly requires both.
Possible contributors include moisture movement, soluble contamination, osmotic pressure, retained solvent, poor adhesion, temperature gradients, cathodic effects or chemical exposure. Distribution is informative: blisters near immersion lines, welds, repairs or recurring wet locations may justify different follow-up questions.
Do not open a blister merely to see what is inside. Opening is destructive and changes the evidence. Obtain authorization, photograph the intact condition, define safety and sample handling, and plan repair. Preserve traceability for any collected material.
Peeling and delamination indicate separation within the coating system or at an interface. “Poor adhesion” is a performance description that should be supported by a specified test or clear physical evidence, not inferred from one loose edge alone.
The failed interface is central. Separation may occur between substrate and primer, between coats, within a layer, or at a repair. Record both sides of the detached film, including substrate condition, residual coating, contamination and corrosion products.
Possible contributors include inadequate surface preparation, dust or soluble contamination, condensation, exceeded or insufficient recoat interval, incompatible layers, under-cure, over-cure, excessive film build, thermal or mechanical stress, and service exposure. Compare the physical evidence with the actual preparation, environmental, application, batch and recoat records before assigning weight to any cause.
Adhesion testing can damage surrounding coating and does not automatically identify root cause. Use the project’s method, location plan, criterion and repair controls. If testing is not authorized or representative access is unavailable, document the limitation and escalate.
Cracking, checking and flaking are related deterioration forms but should not be used as interchangeable words. Cracking involves breaks through one or more layers; checking is a pattern of fine surface breaks; flaking is loss of coating in flakes or scales. Underfilm corrosion is corrosion developing beneath or spreading under the coating, sometimes visible as rust staining, lifting or creepage.
Current ISO references include ISO 4628-4:2016 for cracking and ISO 4628-5:2022 for flaking. ISO 4628-4 remains current but was under systematic review when this article was prepared, so the publication status should be checked when the project selects an edition. ISO 4628-3:2024 addresses assessment of rusting. ASTM’s official coating catalogue lists D661-93(2019) for cracking, D772-24 for flaking and D610-25 for rusting.
Possible contributors include ageing and embrittlement, excessive total film build, incompatible layers, cyclic thermal movement, substrate movement, ultraviolet exposure, chemical attack, mechanical damage, loss of adhesion or corrosion expansion. The crack pattern, depth, orientation, substrate geometry and service history help define the next check.
Rust staining does not always prove that corrosion started directly below the visible stain; contaminated water can carry corrosion products from another location. Record the source path, coating break, affected area and evidence of active corrosion. Connect significant service findings to integrity decisions when the condition may affect remaining protection, inspection interval or repair priority.
Use the least intrusive evidence that can answer the decision, then escalate only when uncertainty or consequence justifies it. This evidence ladder keeps the investigation proportionate and traceable.
Evidence from a later rung does not erase missing basic records. A laboratory result without clear sample location, chain of custody or coating history may be less useful than a complete set of traceable field records.
The matrix below is a decision aid, not a universal acceptance table. Project documents control the required tests, values, repair method and acceptance authority.
| Observed symptom | Do not assume | Evidence to collect | Confirmation checks or tests | Repair or disposition control | Close-out and retest |
|---|---|---|---|---|---|
| Runs or sags | “Applicator error” or excessive thickness without readings | Location, orientation, WFT/DFT, material and thinner records, spray settings, environment | Visual boundary, cured DFT distribution, hardness or cure check if specified | Approved acceptance, levelling/abrasion and recoat, or removal based on requirement | Inspect feathered transition, cleanliness, recoat condition and final DFT/appearance |
| Dry spray, overspray or orange peel | All rough texture has the same cause or consequence | Gun distance/pressure, wind and temperature, access, viscosity, adjacent work | Surface soundness, contamination, DFT, adhesion/cure only if specified | Protect adjacent areas; remove weak/loose material; prepare and recoat as approved | Visual finish, continuity, adhesion or DFT when required |
| Pinholes, holidays or missed coverage | One detected point represents the full extent | Test map, layer, thickness, geometry, porosity, application and stripe-coat records | Approved visual or holiday test after cure; expanded area if procedure requires | Mark, prepare and repair each location with compatible system | Repeat the specified test and close each mapped location |
| Blistering | Moisture or salts are proven causes | Size/frequency rating, distribution, service zone, environment, coating history | Approved pictorial rating; authorized opening, adhesion or sample analysis if justified | Preserve evidence before destructive work; define local versus broader removal | Inspect substrate and transitions, verify repair stages and monitor recurrence if required |
| Peeling, delamination or poor adhesion | Surface preparation is automatically at fault | Failed interface, both fracture faces, preparation, dust/salt, environment, recoat and cure records | Authorized adhesion/cure examination and representative extent survey | Determine repair boundary; remove unsound coating; approve preparation and compatible rebuild | Stage inspections, adhesion/DFT where specified, final boundary and acceptance record |
| Cracking, checking or flaking | Age alone explains the condition | Pattern, depth, layers, TDFT, flexibility, temperature cycles, service and maintenance history | Specified visual rating; authorized cross-section or specialist review if needed | Define whether local repair is viable or system removal is required | Confirm removal of unsound coating, rebuild and any follow-up inspection interval |
| Rust staining or underfilm corrosion | Visible stain marks the corrosion origin or full extent | Moisture path, coating breaks, creepage, substrate condition, service and CP data where relevant | Specified rust rating, extent survey, authorized opening or thickness assessment | Control active source; define repair boundary and substrate treatment | Verify preparation, coating rebuild, continuity and integrity close-out |
For inspectors who want structured practice in defect recognition, inspection methods, failure-analysis fundamentals and QA documentation, review NTIA’s coating defect inspection training. The course page should be checked for the current syllabus before enrolment.
A defensible record makes the requirement and evidence visible. It also keeps an unconfirmed cause out of the factual statement.
Finding wording pattern
| NOTE: At [item/location] on [date/time], [observed condition and extent] was identified on [coating layer/system, if known]. The applicable requirement is [controlled document and requirement]. Evidence recorded: [photos, readings, test method and records]. Compliance status: [conforming/nonconforming/pending technical evaluation]. Cause: [not established / supported conclusion with evidence]. Required disposition: [responsible authority and due action]. |
Use a nonconformity report when objective evidence shows that a specified requirement was not fulfilled and the project process requires NCR control. ISO/IAF auditing guidance describes a well-documented nonconformity through three elements: evidence, the requirement and a clear statement of the nonconformity. NTIA’s guide to writing a defensible NCR expands the reporting and close-out workflow.
A punch item can control incomplete work, minor finishing or a defined outstanding action under the project process. Do not downgrade a nonconformity to a punch item to avoid formal review, and do not raise an NCR merely because a defect name sounds serious. Classification follows the requirement, evidence and agreed quality process.
Distinguish correction from corrective action. Correction or repair addresses the detected condition. Corrective action eliminates the cause of a nonconformity to prevent recurrence. Recoating one sagged area may correct it; changing application controls, training, equipment setup or supervision may form part of corrective action if investigation shows that the cause is systemic.
Repair is a controlled coating operation, not the final sentence in an NCR. Before work starts, define the accepted disposition, repair boundary, removal method, substrate or intercoat preparation, feathering, cleaning, environmental conditions, compatible materials, application stages and inspection points.
Feathering should create a sound transition from retained coating to the prepared repair area. A visually smooth edge is not enough if weak coating remains outside the boundary or the exposed layers are incompatible with the repair system. Confirm the boundary by the approved method and protect sound adjacent coating.
Recoat controls should address cleanliness, contamination, surface condition, cure and the applicable overcoating window. If the window has been exceeded, follow the approved product and project instructions rather than improvising abrasion or solvent treatment. Record new batch details and application conditions with the same traceability expected for original work.
Retest the repaired condition using the method required for the original acceptance question. A repaired holiday should be holiday-tested again; a repaired DFT nonconformity should be reassessed for thickness under the approved procedure; an adhesion-related repair may require staged verification or representative testing if specified. Close-out should show that the condition, repair and evidence all refer to the same location.
Escalate when the consequence is high, the defect is widespread or recurring, the cause remains ambiguous, the coating system is complex, legal or warranty issues are possible, or destructive examination and laboratory analysis are needed. The coating inspector contributes accurate field evidence but should not claim specialist conclusions outside their competence or authority.
A failure-analysis plan may include document review, mapping, layer identification, microscopy, chemical analysis, adhesion evaluation and service assessment. It should protect evidence, define sample traceability and identify who may interpret results.
Use neutral language while the investigation is open. “Blistering was concentrated below the normal liquid level and fluid was observed after authorized opening” is evidence. “The contractor trapped salts under the coating” is an allegation unless records and analysis support it.
A defect is an observed condition that may affect appearance, performance or compliance. Failure means the coating no longer performs a required function or reaches an unacceptable condition. A defect can exist before failure, and not every cosmetic defect is a functional failure.
Usually not with confidence. Appearance can identify plausible contributors and direct the next checks, but supported diagnosis needs records, tests, distribution evidence or controlled examination.
Not exactly. A pinhole is a small pore or opening. A holiday is a discontinuity detected by the applicable method, and it may include a pinhole, missed area, crack or other break in continuity.
Use the standard and edition required by the project. ISO 4628 and ASTM coating standards provide different assessment frameworks; one should not be converted into the other without an approved project basis.
No. An NCR is appropriate when objective evidence shows failure to meet a specified requirement and the project quality process requires formal nonconformity control. Some observations remain findings pending evaluation, while some incomplete items may be managed as punch items.
Repair or correction addresses the detected defective condition. Corrective action addresses its verified cause to prevent recurrence. A repair can close the physical area without resolving a systemic cause.
No. Both can be destructive and may affect evidence, safety and the repair scope. Obtain authorization, select representative locations, document the intact condition and define how the test area will be repaired.
Close-out normally links the original location and requirement to the approved disposition, preparation and environmental records, material batches, application stages, inspection results, retest and final acceptance. The exact evidence set is project-specific.
When a defect is found, resist the urge to name the cause first. Describe the condition, identify the requirement, climb the evidence ladder and obtain an approved disposition. Then inspect the repair and retest the original acceptance question.
Use NTIA’s coating inspection guide for the complete inspection lifecycle. For structured learning in coating defects, inspection methods, failure-analysis fundamentals and QA documentation, see the Industrial Coating and Painting Inspector Training Course.

At NTIA (Norwegian Technical Inspection Academy), we specialize in delivering world-class training programs in vendor inspection, quality surveillance, and technical compliance – specifically tailored for professionals in the oil, gas, and energy industries.
Copyright © 2025 by NTIA. All Rights Reserved.